


By now you’ve likely seen my ‘iBook’ project. As I mentioned, I documented the process and now I’m here to post the guide in case anyone else is interested in making their very own. There is definitely more than one way to make a book safe, and if you have more appropriate tools, feel free to improvise. The methods I selected we’re based on low cost and simplicity and will at least give you a good idea of the process. Let’s get started.
Project cost: aprox. $10
Project time: this project can be completed in a single day, but you’ll definitely want to set aside a large chunk of time for page cutting (might want to grab your headphones for some music!)
Required materials:
- A fitting book
- Precision knife (Xacto, packaging knife, etc.)
- Rubber cement
- Scotch tape
- Pencil
- Patience (quite a bit of it)
Tips for book selection:
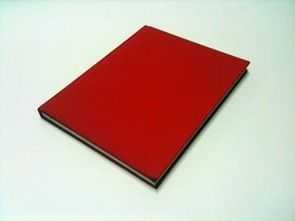
Local bookstores are likely to have very inexpensive used books. The one I used was $2. I bought three books of varying sizes to be sure I got the fit I wanted. I used one book as a practice first before doing the final one (lots of cutting!). I took my iPad to the store to size up several books. Things you want to look for in the book depth, be sure that there are enough pages in the book that your iPad will fit all the way in. This is probably the toughest part of the selection process because it can be hard to judge. You may wish to measure how high your iPad stands off of a flat surface before going to the book store, then find a book with page width that is equally or slightly deeper than the measured value. Be sure that the book has enough padding around your iPad. That is, make sure that when you cut out the shape, the resulting thickness of the pages is enough to support your iPad and withstand a fairly intensive cutting process. You don’t want to try cut the shape out with, say, 0.2 inch of padding, you’ll likely rip some pages during the process. There is about 0.75 inch of padding in my final iBook.
Steps


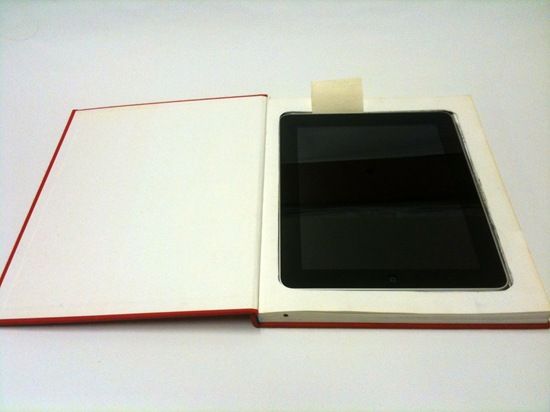
Remove the cover of the book (if it has one) and center the iPad face-down inside the cover. Use the pencil to trace an outline, you should hold the pencil perpendicular to the paper so that the side of the pencil pushes against the side of the iPad as you trace. The distance from the side of the pencil/iPad to the tip leaves a good buffer in your outline and subsequent cut to ensure a good fit. If you cut it a little too big you can always add spacers to increase the tightness, but if you cut it too small, you’ll have a hard time figuring out how to recut all of the pages…. (Note that the volume rocker and hold switch will be on the opposite site when the iPad is face-up in the finished product, cutting around them specifically would be too tedious, this is what the buffer is for.)
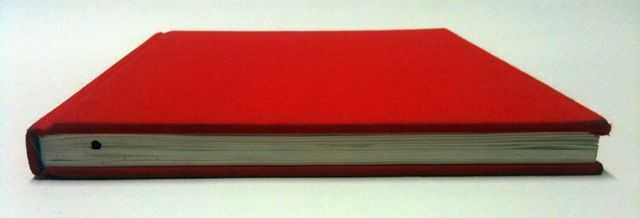
 You want your first several cuts to follow the rounded shape of the iPad’s corners. I’d recommend cutting the rounded corners for 10-20 pages. After that you’ll be cutting square corners (much easier!), but the top pages will give it a round corner look, which will give a more custom-fit appearance. Use your knife to begin cutting on your outline. I pressed very firmly with my knife to cut through several pages at once, then pulled them out until I needed to cut again (early enough that I could still see previous cut marks and knew where to cut). Finding the right number of pages to cut through and pull out before making more cuts its probably the most challenging part of this project. Just make your cuts carefully and eventually you’ll get into a rhythm. Don’t forget to square your corners after the first 10 or 20 pages and continue to cut them that way. Square corners are much easier to cut than the rounded ones. I used a paper clip to keep part of the cut pages closest to the binding out of my way while I continued to cut. They don’t like to fold back with the rest of the page because most of their support has been cut out!

While cutting, do occasional test fits to ensure that the cuts are coming out properly. If you aren’t through too many pages, put the iPad in face-down to get the best idea of how it will fit (the rounded back makes this deceiving when it is face-up and you don’t yet have a lot of depth.) Finding that you are having fitting problems would be much better in the first 30 pages then after 200 cuts! As long as you were careful with your outline (and added an appropriate buffer) and keep the cuts consistent, you shouldn’t have an issue. One thing to look out for. The more pages you cut and fold back, the further the subsequent pages will be pulled toward the binding (slowly misaligning the top cut from each one underneath). If you don’t correct for this, your page cuts will have a distinct diagonal shape on the left and right. You can adjust for this by slowly moving your cuts to the right to keep them in the same relative position as the first cut (be sure to do this on the left and right sides of the cut.)

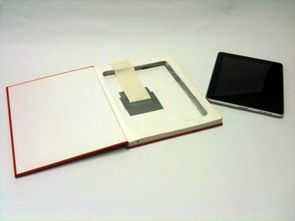
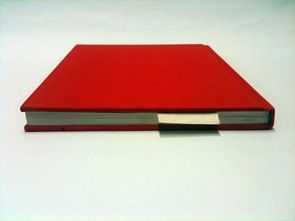
Once you’ve cut deep enough to fully fit the iPad, you are going to use your tape to hold the pages in their closed-book positions. The first thing you want to do is to hold the cover of the book at a 90 degree angle (or prop it against something) while you use scotch take to make small wraps around the pages. In the picture above, I colored on the tape with sharpie so it could be easily seen. I picked up the whole of the pages and slid a piece of scotch under them to begin, then set them down and wrapped it around the outside to the top (do this for each piece of tape applied.) I folded the tape back on itself at the end to make a non-sticky tab that I could use to grip to remove the tape easily.

When you are satisfied with the way the pages are being held, flip open the back cover and apply rubber cement to the back of the very last page (yes, over top of the tape). Once it is covered all the way around, close the back cover, flip the book over, and open the front cover. Begin applying rubber cement quite liberally around the inside surface of the page cuts. Close the cover and rest some weights on top of the book for at least an hour while it dries. When you return, remove the tape (it’s glued in the bottom cover, you can cut it, or it’ll rip pretty easily.)
Once the back cover and inside has been glued, flip the book face-down and slide a piece of paper or two between the block of pages and the front cover of the book to protect the cover and create a shelf for the rubber cement to rest on while you glue around the outside of the page block. Don’t worry about getting glue against the back cover as its already glued down to the pages!- Once you’ve got it all glued up you should rest some weight (other books work well) on top of it to keep everything firmly pressed down as the adhesive dries. After a few hours of drying you can remove the weights and open up the front cover to allow the inside adhesive to air out and dry. Depending on how tightly your fit turned out, you may choose to add the bookmark/tab piece to assist in removing it from the case.


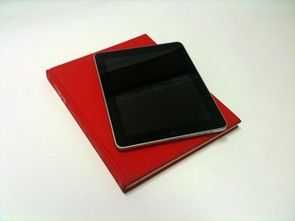
Enjoy your iBook case.